Short version: I am managing my TiddlyWiki wikis as stand-alone HTML documents using a WebDAV server accessed securely from anywhere via Tailscale and I can now drag and drop images into content and have them uploaded and linked automatically. It's brilliant!
As much as I love TiddlyWiki, I've never enjoyed managing images with it. Embedded images are easiest but can quickly bulk up the wiki's HTML file size, so I reference them instead. I've done this a couple ways.
The cheat version is to just use the embed code of an image I've previously uploaded to Flickr. The second best option is to put the images in a /files directory within the same directory as the wiki itself and reference it using something like [img[files/my-image-file.png]].
It's not hard to do, but having to move each image to my wiki/files directory, then hand-write the path/filename to create a link adds just enough friction to prevent me from using images as freely as I might otherwise.
TiddlyWiki 5.2.0 was released recently, and it includes a great new feature that lets me drag and drop an image into an open "tiddler" which is then embedded and linked automatically. This is a terrific improvement, but it still embeds the image within the wiki file, which I was hoping to avoid.
Enter the File Uploads plugin from Saq Imtiaz and with it a brand-new PUT option for WebDAV.
This is all pretty new to me, so I'm probably not qualified to write a full-on tutorial, but here's what I did...
Upgraded my wiki to 5.2.0. (https://tiddlywiki.com/upgrade.html)
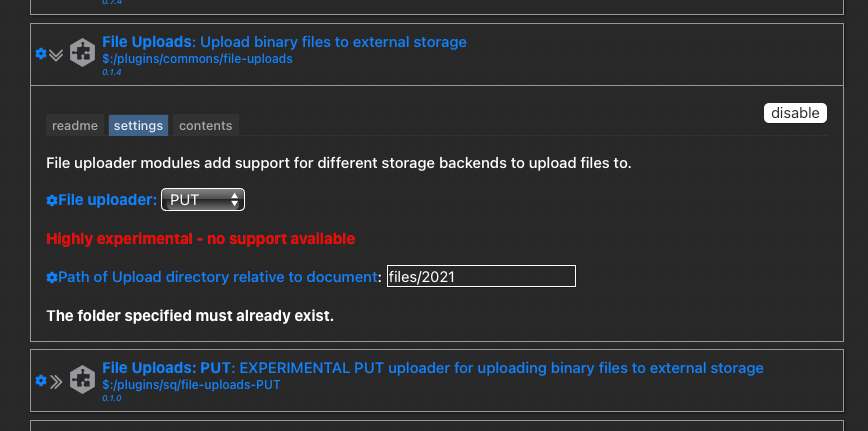
Installed the File Uploads plugin and the accompanying PUT plugin via simple drag and drop into my wiki file (TiddlyWiki is cool that way).
Configured the plugin by telling it to use the "PUT" uploader and where I'd like uploads to go (relative to the wiki file itself). I chose "files/2021".

I run my wiki via WebDAV using the WebDAVNav Server app for macOS. There are other options for other OSes, but I'm not familiar with those. The benefit for me is that I can open and save my wiki with any browser, no other extensions are required. I run the WebDAV server on my Mac Mini and visit it there via https://localhost:8080/index.html.
This is where the magic happens. I open a tiddler, drag an image into it, and boom! the file is uploaded to the files/2021 folder and a wikitext link is inserted automatically. So cool.
This is all dandy when editing the wiki on my Mac Mini with the WebDAV server running, but what about from my MacBook Air? I could probably figure out the IP used by the Mini on the LAN and access it that way, but that only works in my house if I want to get into dynamic DNS and port forwarding. (I don't).
Enter Tailscale, "Zero config VPN. Installs on any device in minutes, manages firewall rules for you, and works from anywhere."
I was up and running with Tailscale on all my Macs, my iPhone, and my iPad in less than an hour. Tailscale provides a private network I can access from all my devices. This means that I can reach and edit my wiki via https://100.74.14.72:8080/index.html from everywhere. (That IP is not publicly routable so it's safe to share it.)
It works with the WebDAV PUT uploads, too. I can drag an image from the Photos app on my iPad into Safari and the file ends up where it belongs on my Mac Mini. Magic!
I don't know yet what the gotchas of this approach might be, but so far it has solved all of my issues with managing a single-file wiki with images from all my devices.
My wiki is published via Github Pages, so in order to push updates, I do need to commit and push the repo. I have the repo directory synced using SyncThing so the changes are always available on both my Macs. While I can edit my local version of the wiki from iOS, I'm not yet able to publish it from there.
It may look like a lot of fuss and moving parts, but so far I haven't felt any pain from it. All of the individual parts (TiddlyWiki, WebDAV server, Tailscale, SyncThing...) run without issues and there aren't too many dependencies between them.
I hope this has made enough sense to get you started. Feel free to ask me to clarify anything you find confusing or missing.